

First I cut out 3 x 4 inch rectangles of background fabric and backing fabric. Using the technique described below, these dimensions should result in a standard 2 1/2 x 31/2 atc. I also cut out slightly smaller rectangles of batting.


These were prepared ahead of time. Participants also had the choice of selecting any of the backing rectangles to embellish and use as the front if they preferred not to piece.
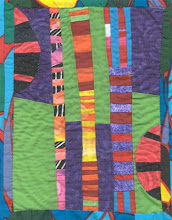
 This is how I created the atc shown in the first photo. Using scraps of fabric and by sewing and flipping them over, the front was created.


The next step was to center the batting behind the front (top) and begin attaching embellishments. For this atc, I attached a layer of tulle and a bit of novelty yarn.


 After adding the embellishments, select a backing. Then pin the three layers (top, batting and backing) together. Sew along the edge (a scant 1/4 inch), leaving an open space along the middle of one of the longer sides.
Carefully turn the piece inside out. Use an object such as the blunt end of a skewer to make sure all of the corners are turned out.


 Sew the edges of the opening together. Then add any additional embellishments and quilt as desired. Participants were also encourage to sign and date the back.


 Quilter Blogs & Store Search


7 comments:
And your ATCs are gorgeous! I'll be posting pictures of the one I have of yours on my blog soon.
I enjoyed to see your process; great tutorial! Do you always use the batting as foundation?
Very nice! I guess by leaving one side open after turning, you could make the ATC also a little pocket for keeping treasures in.
Serene and peaceful I feel like I am looking at a pond. Thanks for the tutorial.
Corrine
Thank you, thank you, thank you, Deborah! Not only for your heads-up e-mail about the tutorial, but also for the links you sent previously.
I've got a BIG interest in this little project, and hope to try it soon. If I have any questions, I will indeed be in touch. I'll be posting on my blog with the results. Here's hoping it goes well. I just love these little works of art!
Thanks for the tutorial!
What a beautiful ATC. Thanks for the tutorial.
Post a Comment